© 2024 Cs Patio Covers. All rights reserved
DIY Patio Cover Installation Tips
DIY Patio Cover Installation Tips
Last Updated on November 23, 2023 by admin
Creating a comfortable and stylish outdoor living space is a dream for many homeowners. A DIY patio cover installation can be a rewarding project, offering shade, protection, and an aesthetic boost to your backyard.
However, tackling such a project requires careful planning, the right materials, and a step-by-step approach. In this comprehensive guide, we’ll explore various aspects of DIY patio cover installation, from selecting the right materials to the actual construction process.
- Planning Your DIY Patio Cover
Before diving into the construction phase, thorough planning is essential. Start by assessing your outdoor space and determining the purpose of your patio cover.
Are you looking for a simple shade solution or a more elaborate structure that can withstand various weather conditions?
Consider factors such as the size of your patio, local weather patterns, and the architectural style of your home.
When planning, also check local building codes and regulations. Permits may be required for certain types of patio covers, and adherence to these regulations ensures both safety and compliance.
Once you have a clear understanding of your requirements and the legalities involved, you can move on to the next steps in the planning process.
- Selecting the Right Material
Now, decide on the type of material for your patio cover. Common options include wood, aluminum, and vinyl. Each material has its own set of advantages and disadvantages.
- Wood Patio Covers
Wood remains a popular choice for patio covers due to its natural beauty and versatility. When opting for a patio covers wood, consider using pressure-treated lumber, cedar, or redwood for enhanced durability and resistance to decay.
Before purchasing the materials, calculate the amount of lumber required based on the dimensions of your patio cover.
When it comes to design, explore various styles such as pergolas, lattice, or solid roofs. Keep in mind that patio covers wood require regular maintenance, including staining or sealing to protect it from the elements.
Choose a wood species that complements the architecture of your home and fits well with your overall design vision.
- Aluminium Patio Covers
Aluminum patio covers offer a modern and sleek option that requires minimal maintenance. These covers are lightweight, durable, and resistant to rust and corrosion. Additionally, they come in a variety of styles, including lattice, solid roof panels, or a combination of both.
When choosing aluminum, consider whether you want a freestanding structure or one that attaches to your home. Ensure that the aluminum used is of sufficient thickness to provide stability and support. Many aluminum patio covers come with a factory finish that requires no additional painting. This can be a significant time-saver in the installation process.
Look for covers with a powder-coated finish to enhance durability and resist fading over time. Patio covers for chairs in aluminum are an excellent choice due to the material’s inherent durability, resistance to rust and corrosion, making them ideal for outdoor settings. Additionally, opting for aluminum for both patio covers and furniture ensures a cohesive and low-maintenance ensemble that withstands the elements with style.
- Vinyl Patio Covers
Vinyl patio covers are another low-maintenance option that provides durability and versatility. These covers are resistant to rot, insects, and fading, making them an excellent choice for homeowners seeking a hassle-free solution. Vinyl covers come in various styles, including solid roof panels and lattice designs.
One advantage of vinyl is its ease of cleaning. Unlike wood, vinyl does not require staining or painting. Regular cleaning with soap and water is usually sufficient to maintain its appearance.
When choosing vinyl, ensure that the material is of high quality and thickness to withstand wind and other environmental factors.
- Preparing the Site
Once you’ve selected the material for your patio cover, it’s time to prepare the site. Begin by marking the area where the patio cover will be installed.
Use stakes and string to outline the dimensions, ensuring that the layout is square and level. This step is crucial for the proper alignment and stability of your patio cover.
If your patio cover will be attached to your home, locate and mark the points where it will be secured. Check the existing structure of your home to ensure it can support the additional load of the patio cover.
Consult with a structural engineer if needed, especially if you’re unsure about the integrity of your home’s construction.
For freestanding patio covers, mark the locations of the support posts. These posts will provide the structural foundation for your cover. Use a post hole digger to create holes for the posts, ensuring they are deep enough to provide stability.
The depth will depend on factors such as local building codes and soil conditions. Consider adding concrete footings at the bottom of the holes for added support.
- Construction Process
- Building the Frame
With the site prepared, it’s time to start building the frame of your patio cover. The frame is the structural skeleton that supports the cover material, whether it’s wood, aluminum, or vinyl. Begin by constructing the support posts and securing them in the holes you’ve prepared.
- For wood patio covers — use pressure-treated lumber for the posts to resist decay. Connect the posts with beams to create the basic framework. Ensure that the frame is level and square, making adjustments as needed.
If your patio cover is attached to your home, securely fasten the frame to the existing structure, following local building codes and guidelines.
- For aluminum and vinyl patio covers — assemble the frame according to the manufacturer’s instructions. These materials often come with pre-cut and pre-drilled components for easy assembly. Follow the recommended spacing and attachment methods to ensure a stable and secure structure.
- Installing the Cover Material
Once the frame is in place, it’s time to install the cover material. If you’ve chosen wood, lay the rafters or slats evenly across the frame, leaving a gap between each for ventilation.
Secure the material with screws or nails, ensuring it is well-attached and can withstand wind and other weather conditions.
For aluminum and vinyl covers, attach the panels according to the manufacturer’s instructions. A combination of patio covers with metal roof or solid roof panels and lattice for a stylish and functional design. Ensure that each panel is securely fastened and that any seams are sealed to prevent water leakage.
- Adding Design Elements
Enhance the visual appeal by incorporating patio covers design elements such as decorative end cuts, trim, or architectural details. These elements not only add a touch of elegance but also contribute to the overall aesthetic of your outdoor space.
Consider painting or staining wood covers to match the color scheme of your home or outdoor furniture.
If you’re installing a lattice-style cover, you can use climbing plants or vines to create a natural and lush canopy. This not only adds beauty but also provides additional shade.
Be mindful of the growth habits of the plants you choose to ensure they complement the patio covers design without causing damage to the cover.
- Finishing Touches and Maintenance
Regardless of the material you choose, it’s crucial to seal and waterproof your patio cover to protect it from the elements.
- Sealing and Waterproofing — Apply a high-quality sealant or waterproofing product to wood covers to prevent moisture penetration and decay. For aluminum and vinyl covers, check for any gaps or seams that may allow water to seep through and address them accordingly.
Regularly inspect the sealant or finish on your patio cover and reapply as needed, especially in regions with harsh weather conditions. This maintenance step will prolong the life of your cover and ensure its continued functionality and appearance.
- Regular Cleaning — Maintaining a clean patio cover not only enhances its visual appeal but also prevents the buildup of debris and mold. Regular cleaning is essential to prevent the accumulation of dirt, leaves, and other debris on your patio cover.
For wood covers, a mild detergent and water solution can be used to clean the surface. Be cautious not to use abrasive materials that could damage the finish. Aluminum and vinyl covers can typically be cleaned with a hose or pressure washer, but be sure to follow the manufacturer’s recommendations for cleaning to avoid any potential damage.
Inspect the cover for any signs of wear, damage, or loose fasteners during the cleaning process. Address any issues promptly to prevent further damage and maintain the structural integrity of your patio cover.
Regular maintenance not only keeps your outdoor space looking fresh but also ensures that your DIY installation remains a long-term investment in the beauty and functionality of your home.
- Upgrading Your Patio Cover
Embarking on a DIY patio cover installation is a rewarding endeavor that can significantly enhance the functionality and aesthetics of your outdoor living space. Here are some tips to improve the aesthetics and functionality of your patio cover:
- Adding Lighting and Fans
Transform your patio cover into an inviting and functional space by incorporating lighting and fans. Consider installing string lights, LED strips, or pendant lights to create a warm and inviting ambiance during the evenings.
Ceiling fans can enhance comfort by providing a gentle breeze on warm days and evenings. Ensure that any electrical work is performed by a licensed professional to guarantee safety and compliance with local building codes.
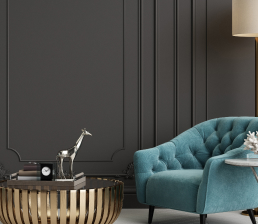
- Outdoor Furniture
Complete the look of your newly covered patio by introducing outdoor furniture. Choose durable and weather-resistant pieces that complement the style of your home.
Comfortable seating, tables, and even an outdoor rug can turn your patio into a cozy and inviting retreat. If space allows, consider adding a dining area for al fresco meals and entertaining.
When incorporating patio covers for furniture, opt for weather-resistant materials to ensure the longevity and protection of your outdoor seating and tables, making the most of the patio covers.
Patio covers for chairs in wood offer a perfect blend of natural aesthetics and durability, providing an inviting and timeless appeal to outdoor seating while ensuring long-lasting resilience against the elements.
- Incorporating Planters and Decor
Bring a touch of nature to your outdoor space by incorporating planters and decorative elements. Potted plants, flowers, and shrubs can add color and vibrancy to the area.
Consider vertical planters or hanging baskets to maximize space and create a lush, green backdrop. Additionally, decorative elements such as outdoor artwork, lanterns, or sculptures can add a personal touch to your patio cover.
The Bottom Line
By carefully planning, selecting the right materials, and following a step-by-step construction process, you can create a beautiful and durable patio cover that complements your home.
Whether you choose the warmth of wood, the modernity of aluminum, or the low-maintenance convenience of vinyl, each material offers unique benefits.
As you enjoy the fruits of your labor, consider further upgrades such as lighting, fans, outdoor furniture, and decorative elements to make your patio cover a true extension of your home.
Following these tips and being proactive in addressing common issues can help your DIY patio cover provide shade and protection with a focal point of relaxation and entertainment in your outdoor oasis.